Some of you may still remember the article about my Harley-Davidson Flathead engine, which covered the beginning of the restoration (for those who haven’t read it and are interested, here’s a link to Part 1 of this chapter).
And now, here is the second part of the story:
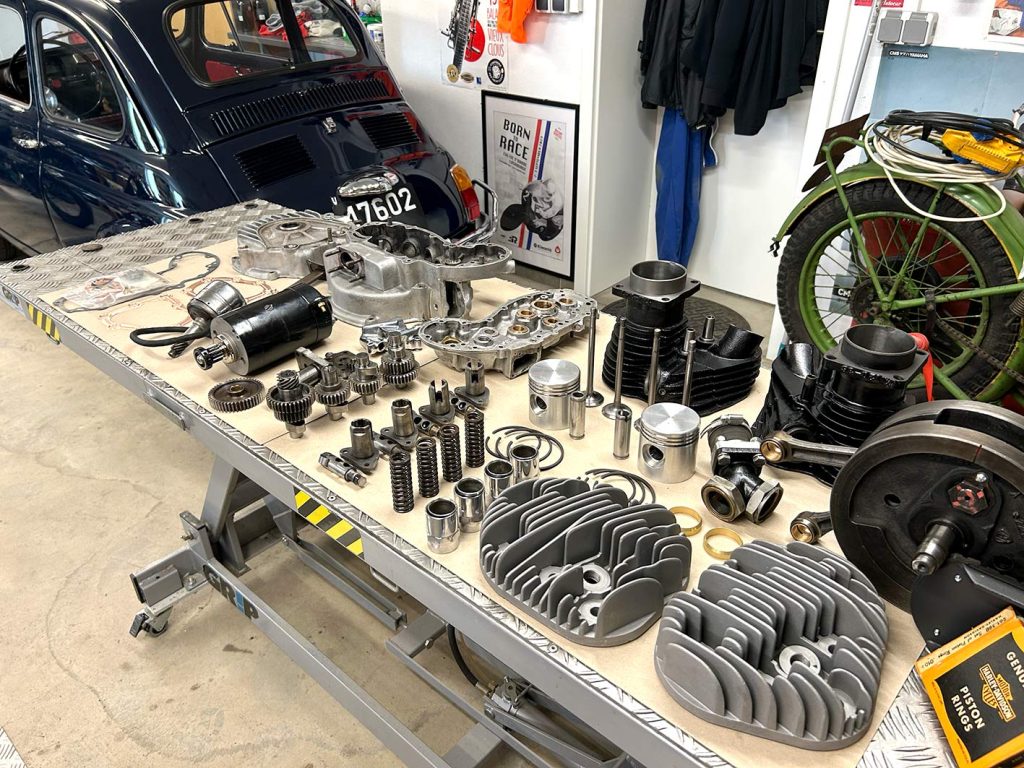
Once the new cylinders and pistons had arrived, the next parts needed to reassemble the engine gradually started coming in as well. These included all the gaskets required to seal the entire engine, all the brass bushings—both for the crankcase and the timing cover—various new roller bearings, new valves with their corresponding valve springs, a new check valve for the oil circuit, a whole series of screens and filters for the crankcases as well as for the two oil pumps, new cylinder heads (previously there had been two different heads installed: one high-compression and one low-compression), and piles of shims to adjust virtually every component of the engine to the correct clearances.
And the complications continued straight away. During disassembly, after removing the cylinders, I had already noticed that the two connecting rods—which on HD engines sit nested together (so to speak, one “male” and one “female” rod) on the crank pin—had quite a lot of lateral play between the two flywheels. So: crankshaft apart!
And there came the next surprise. I discovered that the “female” rod had, at some point in its life, been narrowed by 0.8 mm by someone. It had been done neatly—but why?
After considering various possibilities, I decided to accept the excessive play and try to eliminate as much of it as possible during reassembly by tightening the flywheels together. But that plan didn’t work out. The two new thrust washers fitted to the flywheels were machined so precisely that they didn’t seat properly in the flywheel and deformed when pressed in. The crankshaft wouldn’t assemble properly and the rods were binding.
After ordering new thrust washers from four different suppliers and failing to find a usable pair among the eight pieces I received, I reinstalled the original ones—which were slightly worn on one side—by flipping them around. That finally allowed the crankshaft to be assembled again with an acceptable amount of side play.
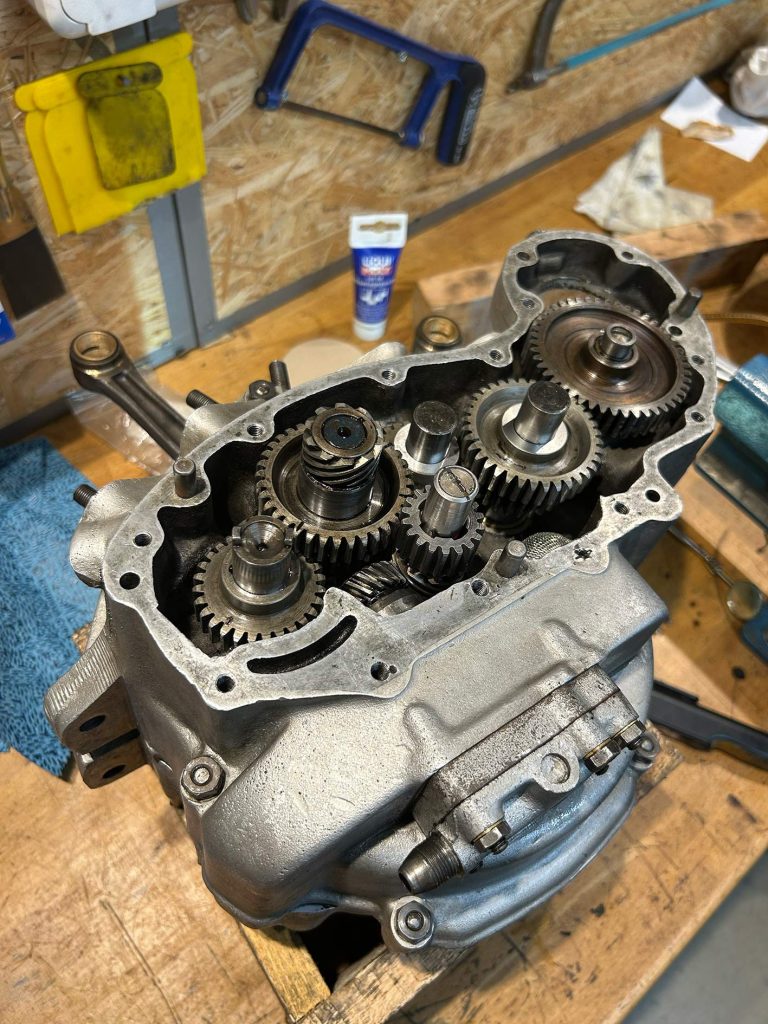
Next came all the bushings in the crankcase and the cover. Since brass bushings compress slightly when pressed in, each one has to be reamed to the correct size after installation. The proper method is to assemble both crankcase halves (which in my case are matching numbers and were fitted together at the factory 80 years ago) along with the cover, and then ream the bushings using the appropriate special tool so that the camshafts and other components run perfectly aligned.
You can also do it individually by hand—after all, we’re talking about a rather agricultural engine here, not a high-tech unit. But since I had the good fortune to get in touch with a wonderful gentleman (thanks, Remon!) who owns a very valuable cabinet full of original Harley-Davidson special tools from decades past and kindly lent them to me for a morning, I drove to Utrecht in the Netherlands with my engine’s bottom end to do the job the proper way using the original tools from back then.
Finally, the actual reassembly could begin! And as one always keeps learning in life, I’ve now gained the wisdom that in the future, whenever dismantling an engine, I will measure and check everything to make sure the correct parts are installed. In my case, a whole series of small components (bearing cages, spacer washers, etc.) were either incorrect or not in the right place.
More than once, after working on the engine over the weekend, I had to order small parts again and pay nearly €20 in shipping each time—for items that often only cost a few euros themselves. Hard-earned money has to go somewhere—and sometimes it ends up with DHL. But at least I’ve learned for next time.
Once the so-called scavenger pump—the oil pump that draws oil from the crankcase and returns it to the oil tank—was properly timed, it was time to shim the camshafts. That meant repeatedly opening the timing cover, inserting shims of various thicknesses, reassembling with a gasket, and measuring from above through the tappet guide openings to check whether the axial play of the camshafts was correct.
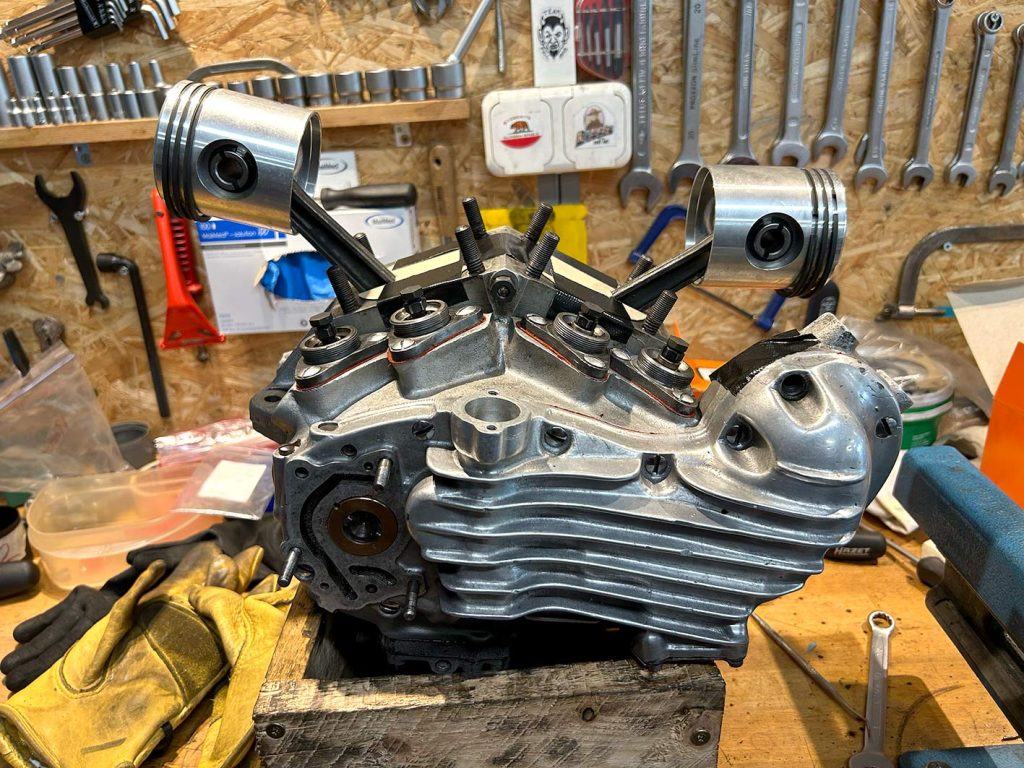
Once that was finished, the tappet guides and tappets themselves could be installed, and the lower end of the engine was essentially complete. The new pistons were fitted with new piston rings, and here again it became clear that reproduction special tools can sometimes be considered reproduction scrap—the tool for installing piston circlips was only fit for the trash.
Fortunately, I found a piece of round steel of the correct diameter in my scrap collection, so my pulse only rose for about half an hour. Pistons warmed up, wrist pins installed, and the circlips fitted using my improvised steel tool.
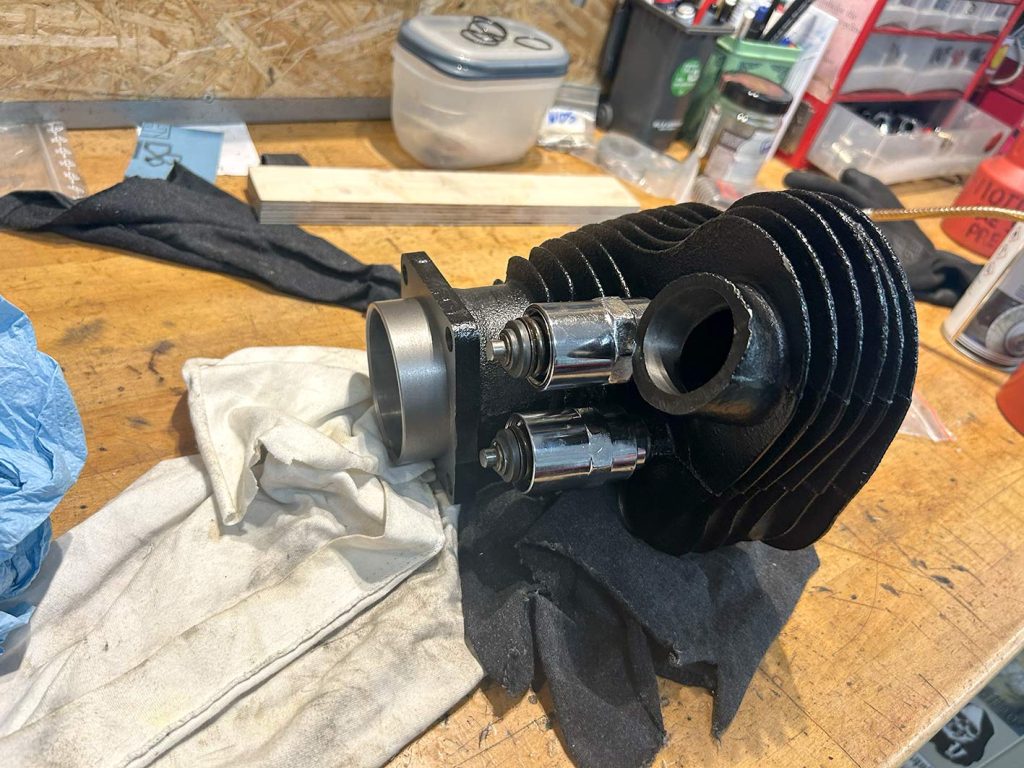
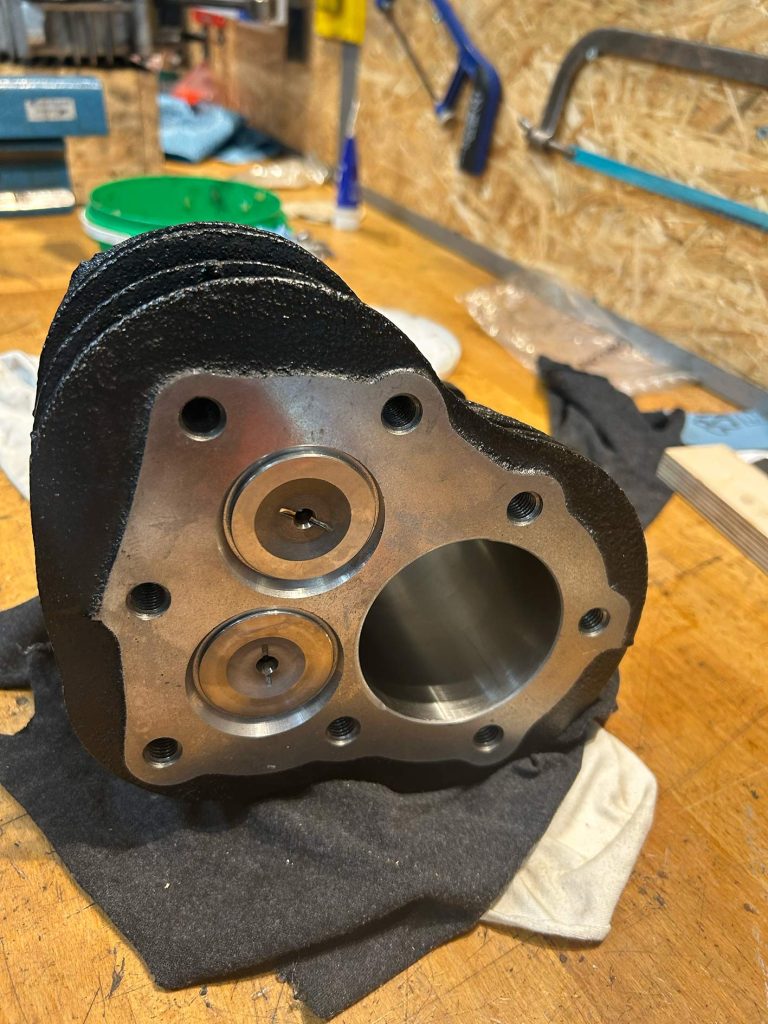
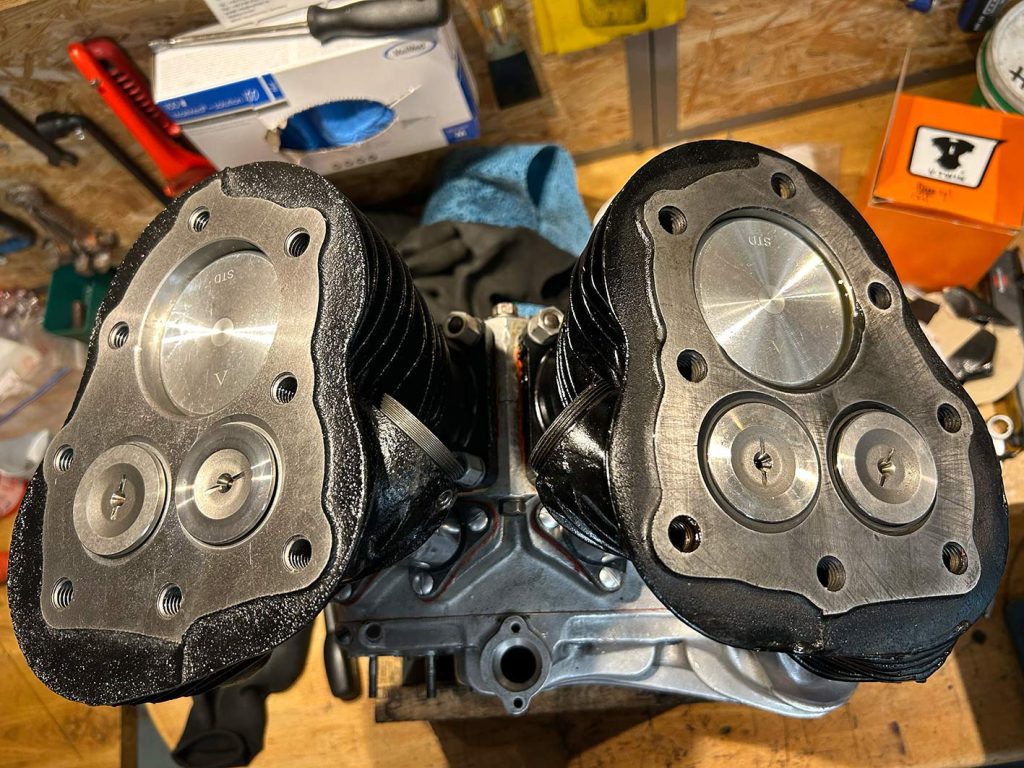
The new cylinders received new valves and valve springs (as we remember, the original cause of this whole saga), were lightly honed once more, and then mounted onto the lower end. New head gaskets, new cylinder covers—and suddenly it looked like an engine again.
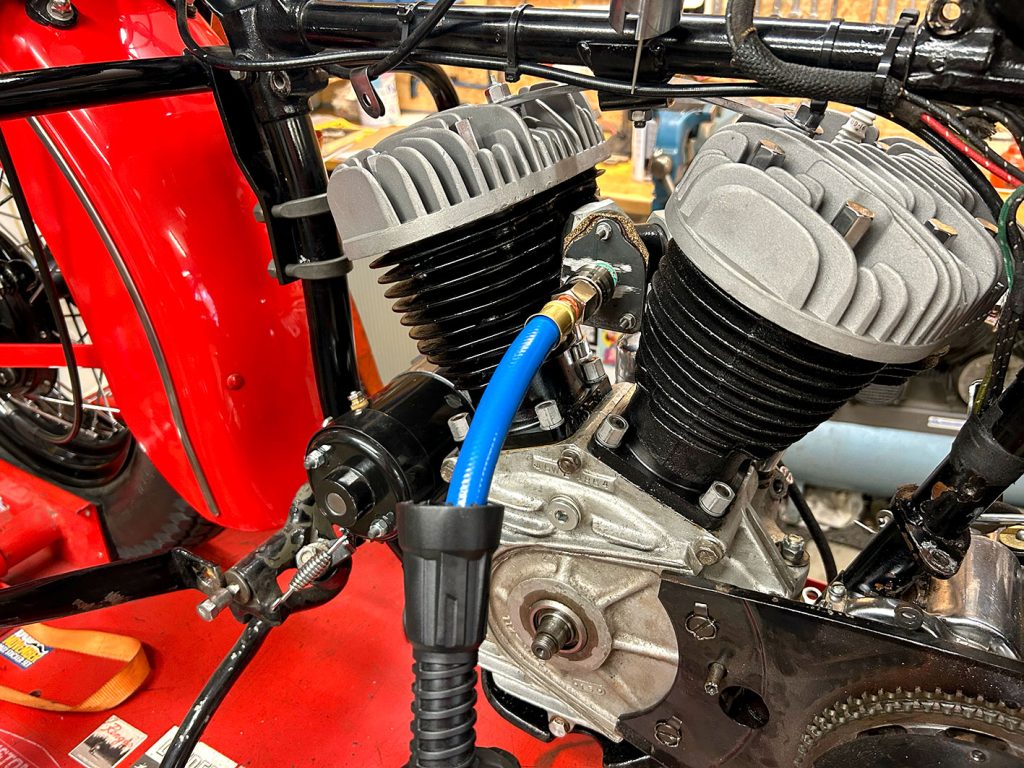
Back into the frame it went, peripherals installed, and time for the first kick. Too much resistance. A new engine should have good compression—but not that much! And on top of that, oil was squirting noticeably from the oil pump (I can already hear you: “Well, it’s a Harley!”).
After much back and forth and a lot of head-scratching, a friend (many thanks, Marc) put me on the right track before I tore everything apart again. It turned out that one of the new brass bushings in the timing cover—specifically the one for the oil pump drive—had been machined so precisely that it was 0.8 mm too thick and was locking up the oil pump when tightened. Incredible!!
The problem was ultimately solved by installing two gaskets instead of one. We’ll see how that behaves in everyday use.
Then the moment finally arrived: the engine could be started for the first time. That’s always a special moment. And when the old lady came to life after the seventh or eighth kick, the stone that fell from my heart could probably have been heard all the way down in the village.
There are still a few small jobs to complete in the coming weeks, and then I hope to carry out the break-in gently in the spring and consider the WL chapter closed for a while (though we all know: with very old machines, the story is never truly finished. Maybe one chapter—but the next one won’t be long in coming…).
Finally, another big THANK YOU to Marc for the phone calls and for sharing his experience. Thanks as well to Pascal for turning oval holes round again, to Yanick for fitting the new bushings, to Remon for lending the tools, and to Nadine, Tom, and Kai for the extra hands when my own two weren’t enough (“push here, pull there…”).
Is the inlet manifold tight?
ma dann wënschen Ech Dir vill Spaas mat der Flatty .
Merci Tweet!